

Recently I’ve been very busy with uni and general life, but theres one thing that there’s always time for: knitting! Knitting is something I just love doing in the evening. You get to curl up under a blanket, put some rubbish tv on and knit away all the days stresses. So after my christmas holidays I was fresh out of projects and needed something to do that wasn’t too time consuming. This is when I came across the Herringbone Stitch.
When I found this stitch on Pinterest I was really excited to try is because its just so different to the sort of hand knitted work you normally see and I also had a ball of James C. Brett Chunky wool that I was just dying to find a use for. And so the two came together in a match made in heaven.
The stitch
Learning the stitch was relatively simple. In a pattern I would probably write “work HB stitch for Xcm” and put an explanation in the abbreviation and the abbreviations would go as follows:
Row 1: Slip 1 stitch knit wise, *slip 1 stitch knit wise, knit 2 together through back loop. Slipping 1 stitch off left needle, slip second stitch purl wise* and continue repeating until final stitch. Knit final stitch through back loop.
Row 2: Purl 2 together, slip first stitch off left needle and repeat until final stitch. Purl final stitch.
When I started learning this stitch it was really easy to make mistakes if I didn’t concentrate properly. The slightly more advanced level that you have to work to to achieve this stitch can be quite a jump if your not used to doing more that just purl and knit but I am convinced that anyone can learn this stitch if they put their mind to it.
I find the best way to learn a new stitch or technique is to repeat it until you have the stitch firmly in your muscle memory. That’s why scarves are the perfect project for something new!
Finishing
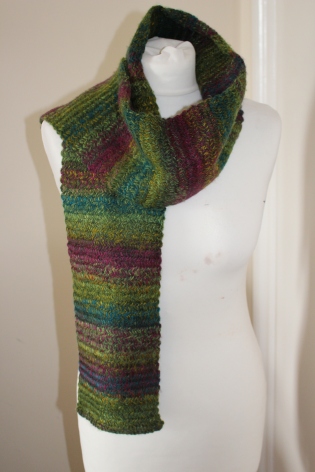
After casting off I was so excited that it was done. I had to wear it immediately and the photo to the left here is the photo I just had to send to my mum! I also wore it over the
next few days and found a problem that I should probably have expected: the edges were curling in.
To fix this, all I needed to do was a very tentative steaming. I was really scared to do this at first because I was super super scared of ruining it, but at the same time I knew I needed to force my self the experiment so that I could learn from it.
For steaming I had the massive benefit of being able to use my college industrial irons. Which means that I had and really high quality steamer the the board has an extractor fan in it which allows the heat to be drawn out of the scarf basically as its being applied.
I quickly learnt while pressing and steaming was that I had to put practically no weight on the scarf and have the steam and fan going simultaneously so the acrylic yarn wouldn’t melt.
The final outcome was thankfully lovely! Its definitely thinner (despite putting next to no pressure on it) and the acrylic yarn has taken on a lovely shine. But best of all the edges no longer curl which was a massive relief!


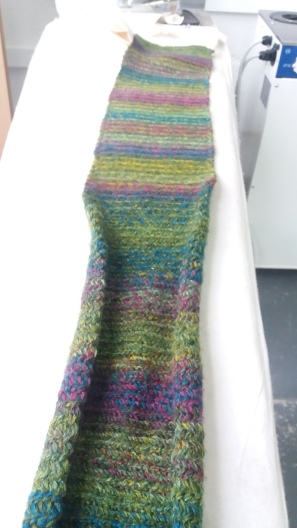
So there we have it! Just above here we have the back (left) and the front (right) all finished and in closeup. The steaming only added benefit to the scarf, making it more like one material. So all in all I’m really really pleased with how it turned out. Definitely one to keep me warm when the wind blows down in Plymouth!

Becky that’s lovely. Well done. I couldn’t see the herringbone stitch in the original photo you sent me . These pic are really clear so now I appreciate the project better.
LikeLike
I’m glad you like it! Now you can understand how excited I was when I finished it!
LikeLike